Replacing a Piece of Hardie Plank Siding
Replacing a piece of Hardie plank siding might seem daunting, but with the right tools and a little know-how, it’s a manageable DIY project. This guide walks you through each step, from identifying the damage and gathering supplies to installing the new siding and finishing the job professionally. We’ll cover everything from choosing the correct type of Hardie plank to ensuring a watertight seal, so you can confidently tackle this home improvement task.
We’ll explore various scenarios, like replacing a small damaged section, a larger area, or even a corner piece. We’ll also emphasize safety precautions throughout the process, ensuring you complete the repair safely and effectively. Get ready to learn the ins and outs of Hardie plank siding replacement!
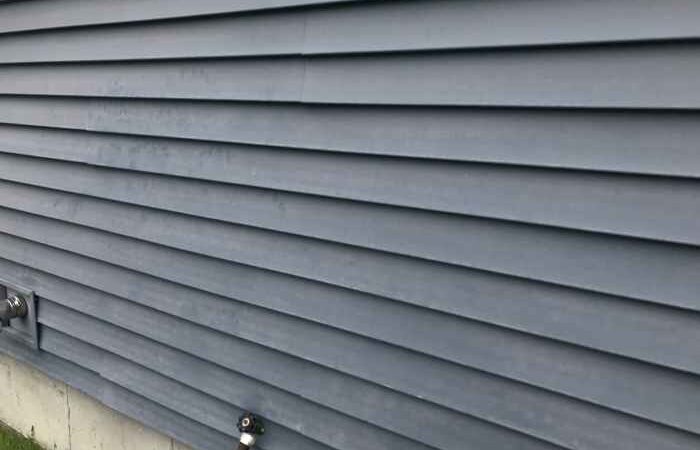
Identifying the Damaged Hardie Plank: Replacing A Piece Of Hardie Plank Siding
Source: pressurewashingresource.com
Replacing a section of Hardie plank siding is a straightforward DIY project, but accurately identifying the damaged area is the crucial first step. Failing to do so could lead to unnecessary work or, worse, incomplete repairs. This section will guide you through the process of pinpointing the extent of the damage.
Hardie plank siding, while durable, is susceptible to various types of damage over time. Understanding these common issues will help you quickly assess the need for replacement.
Types of Hardie Plank Damage Requiring Replacement
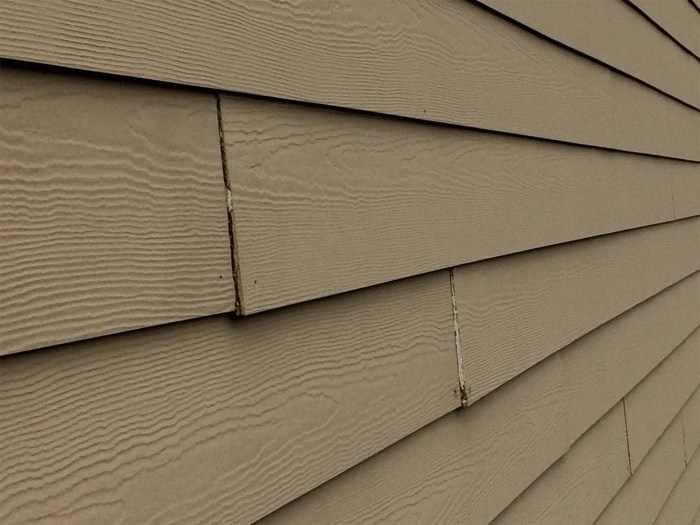
Different types of damage necessitate replacement. Ignoring minor issues can lead to more extensive problems later. Common damage types include cracks, rot, and impact damage. Cracks can be hairline fractures or larger splits, often caused by expansion and contraction due to temperature changes or settling of the house. Rot, usually found near the ground or in areas with prolonged moisture exposure, weakens the material significantly. Impact damage, resulting from collisions with objects like branches or debris, can cause dents, chips, or complete breakage. Determining the exact nature of the damage is key to selecting the appropriate repair method and determining the size of the replacement piece.
Hardie Plank Inspection Checklist
A thorough inspection is vital. This checklist will help ensure you don’t miss any damaged areas requiring attention.
- Inspect the entire siding for cracks, paying close attention to seams and corners.
- Check for signs of water damage, such as discoloration, swelling, or soft spots.
- Look for any dents, holes, or other signs of impact damage.
- Examine areas prone to moisture, like near the ground or around windows and doors.
- Carefully check for any loose or damaged fasteners.
Determining the Size and Location of the Damaged Section
Precise measurement is critical for a successful repair. You’ll need to determine both the exact location and the dimensions of the damaged area to order the correct replacement piece.
To accurately determine the size, measure the length and width of the damaged section, adding an extra inch or two on each side to ensure you have enough material for overlap. For example, if a crack extends 10 inches horizontally, you might want to replace a 12-inch section to ensure complete coverage and a clean seam. Mark the boundaries of the area to be removed clearly with a pencil. This will serve as your guide during the removal process, ensuring a precise and neat cut. Remember to consider the vertical dimension as well, ensuring you have enough to account for overlapping the adjacent planks. For instance, if the damage extends vertically across two courses of planks, you will need to replace the full height of the damaged area.
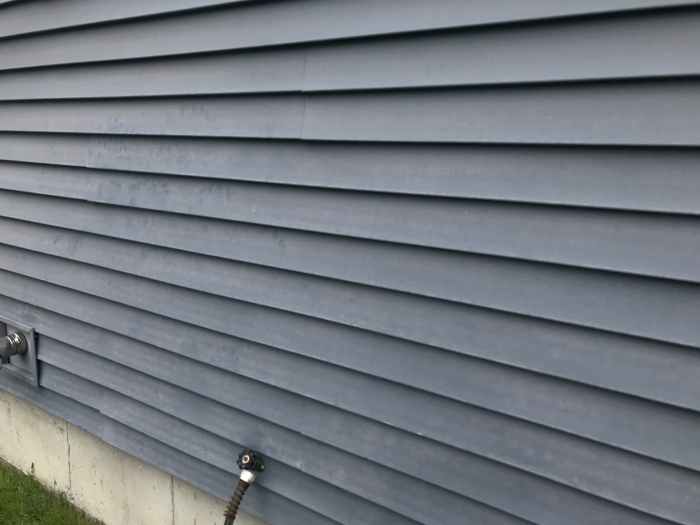
Gathering Necessary Tools and Materials
Source: gambrick.com
Replacing Hardie plank siding requires the right tools and materials to ensure a professional-looking and long-lasting repair. Having everything prepared beforehand will make the job much smoother and more efficient. This section Artikels the essentials.
Essential Tools
Before starting, gather all necessary tools. This will save time and frustration during the repair process. A well-organized workspace is key to a successful repair.
- Measuring tape: Accurate measurements are crucial for cutting the replacement plank to the correct size.
- Pencil: For marking cut lines on the new Hardie plank.
- Circular saw with a fine-tooth blade: A fine-tooth blade ensures a clean cut through the fiber cement material. Avoid using a blade designed for wood, as it can lead to chipping and splintering.
- Safety glasses: Protect your eyes from flying debris.
- Work gloves: Protect your hands from splinters and cuts.
- Pry bar: For carefully removing the damaged siding plank.
- Hammer: For gently tapping the new plank into place.
- Caulk gun: To apply caulk around the edges of the new plank for a weathertight seal.
- Putty knife: For cleaning up excess caulk.
- Ladder (if needed): To safely reach higher sections of siding.
Hardie Plank Siding Types and Applications
Different types of Hardie plank siding offer varying levels of durability and aesthetic appeal. Selecting the right type is crucial for a successful repair that matches the existing siding.
| Type of Hardie Plank | Thickness | Durability | Suitability |
|---|---|---|---|
| Lap Siding | Various | High | Traditional homes, versatile |
| Panel Siding | Various | High | Modern homes, large areas |
| Shingle Siding | Various | High | Homes with a rustic or craftsman style |
| Soffit and Trim | Various | High | Under eaves, window and door trims |
Necessary Safety Equipment
Working with Hardie plank siding, tools, and heights requires prioritizing safety. Appropriate safety equipment minimizes the risk of injury.
- Safety glasses: Always wear safety glasses to protect your eyes from flying debris during cutting and installation.
- Work gloves: These protect your hands from splinters and cuts while handling the fiber cement material and tools.
- Dust mask: Cutting Hardie plank generates fine dust particles that can be harmful if inhaled. A dust mask protects your respiratory system.
- Hearing protection: Power tools like circular saws can be noisy. Hearing protection prevents hearing damage from prolonged exposure.
- Ladder with stabilizer (if working at heights): Ensures stability and prevents falls.
Calculating Replacement Hardie Plank Needed
Accurately calculating the amount of Hardie plank needed prevents material shortages or waste. Measure carefully and add extra for cuts and potential errors.
- Measure the length and width of the damaged area.
- Add an extra 10-15% to account for cuts and potential errors. For example, if you need 10 feet of Hardie plank, purchase 11-11.5 feet.
- Consider the width of the plank. Ensure you purchase enough to replace the damaged section completely, matching the existing siding.
Preparing the Work Area
Getting your work area ready is crucial for a smooth and safe Hardie plank replacement. Proper preparation minimizes the risk of further damage to your home and ensures you have everything you need within easy reach. This involves protecting surrounding areas, safely removing the damaged plank, and disconnecting any nearby utilities.
Protecting surrounding areas from damage is key. Dust and debris from cutting and removing the Hardie plank can easily scratch or mar nearby surfaces. Think of it like preparing a surgical field – you need a clean, protected space to work in.
Protecting Surrounding Areas
Before starting any demolition, cover nearby windows and landscaping with drop cloths or plastic sheeting. Use painter’s tape to secure the coverings and prevent them from shifting during the process. For delicate surfaces like freshly painted walls or trim, consider adding extra layers of protection, perhaps even using foam board to create a buffer zone. Protecting your investment is always worthwhile.
Safely Removing Existing Damaged Hardie Plank
Carefully assess the damaged area. If the damage is extensive, you might need to remove more than just the single plank. This could involve removing adjacent planks to ensure a clean, straight cut for the replacement. Always wear safety glasses and a dust mask to protect yourself from flying debris and inhaling harmful particles.
Start by gently prying the damaged plank away from the surrounding planks using a pry bar. Work slowly and methodically, using caution to avoid damaging neighboring planks. If nails are holding the plank in place, carefully remove them with a hammer and nail puller, being mindful not to damage the surrounding wood. If the plank is severely damaged and difficult to remove, consider using a reciprocating saw with a fine-tooth blade for a cleaner cut. Remember to always cut away from your body and wear appropriate safety gear.
Disconnecting Electrical or Plumbing Fixtures
If the damaged area is near electrical outlets, plumbing pipes, or other fixtures, you must disconnect them before starting any demolition. This is a crucial safety precaution to prevent electric shock or water damage. Always turn off the power at the breaker box before working near electrical outlets or wiring. For plumbing fixtures, turn off the water supply at the main shutoff valve before disconnecting any pipes. If you’re unsure about any aspect of this process, it’s always best to consult a qualified electrician or plumber. Safety should always be your top priority.
Installing the New Hardie Plank
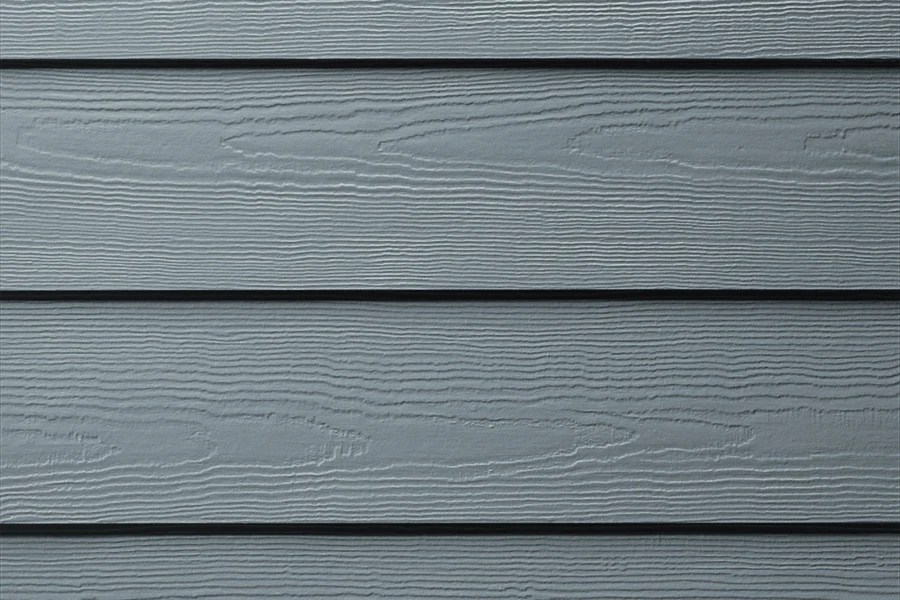
Source: perthfibrecement.com
Now that you’ve prepped everything, it’s time to install the new Hardie Plank. This process requires precision and attention to detail to ensure a long-lasting, watertight repair. Remember safety first – wear gloves and eye protection throughout.
Getting the new piece to fit perfectly is key. We’ll cover cutting techniques, nailing patterns, and sealing methods to achieve a seamless finish.
Cutting and Fitting the Hardie Plank
Accurately cutting the Hardie Plank is crucial for a proper fit. Use a circular saw with a fine-tooth blade specifically designed for cutting fiber cement. Before cutting, measure twice and mark your cut line clearly. Clamp the plank securely to your work surface to prevent movement during cutting. For intricate cuts or curves, a jigsaw with a fine-tooth blade is more suitable. Test-fit the cut piece frequently to ensure it fits snugly against the adjacent planks. If necessary, make small adjustments until the fit is perfect, but avoid excessive trimming which can weaken the plank. Always wear a dust mask when cutting Hardie Plank, as the dust can be irritating.
Installation Process and Nailing Patterns
Once you have a perfect fit, you can begin installing the new Hardie Plank. Start by positioning the plank against the existing siding, ensuring it aligns correctly with the surrounding pieces. Use galvanized or stainless steel nails designed specifically for Hardie Plank. These nails are corrosion-resistant and help prevent future problems. Follow the manufacturer’s recommended nailing pattern; this typically involves spacing nails evenly along the edges and at regular intervals across the surface. The pattern helps distribute the load and prevent warping or cracking. Avoid over-driving the nails, as this can split the plank. Slightly countersink the nails, leaving a small gap for caulk.
Ensuring a Watertight Seal
A watertight seal is essential to prevent water damage. After nailing the new plank, apply a high-quality, exterior-grade caulk to all exposed edges and seams. This will create a barrier against moisture. Focus particularly on the seams where the new plank meets the existing siding. Use a caulk gun to apply a neat, continuous bead of caulk. Smooth the caulk with your finger or a caulking tool to create a smooth, weatherproof seal. Allow the caulk to cure completely according to the manufacturer’s instructions before proceeding to the next step.
Securing the Hardie Plank: Methods and Comparisons
While nailing is the primary method, consider additional securing methods for added strength, especially in high-wind areas. Using construction adhesive along the back of the plank before nailing provides extra bonding strength and further helps prevent water penetration. This method requires careful application to avoid excess squeeze-out. Another method is using stainless steel screws instead of nails, although this might require pre-drilling pilot holes to avoid splitting the plank. Screws offer greater holding power than nails but are more time-consuming to install. The choice between nails and screws depends on personal preference, the specific installation requirements, and the local climate conditions. In extreme weather conditions, combining nails, adhesive, and screws might be the most secure approach.
Finishing Touches and Cleanup
Replacing a piece of Hardie plank siding is almost complete! The final steps involve sealing the new piece for weather protection and cleaning up the work area safely and efficiently. Paying attention to these details ensures a long-lasting and professional-looking repair.
Applying caulk or sealant creates a watertight seal, preventing moisture from penetrating the siding and causing damage to your home. Proper cleanup prevents injury and keeps your property looking its best. Safe disposal of construction debris is crucial for environmental responsibility.
Caulk Application
Apply a high-quality exterior-grade caulk or sealant to all gaps and seams where the new Hardie plank meets the existing siding. Use a caulking gun to apply a smooth, continuous bead, ensuring complete coverage. Too little caulk leaves gaps, while too much can create an unsightly mess. A consistent 1/8-inch bead is generally sufficient. Smooth the caulk with a wet finger or a caulking tool to create a neat, finished appearance. Allow the caulk to cure completely according to the manufacturer’s instructions before exposing it to rain or extreme temperatures. Choosing a paintable caulk allows you to match the siding color for a seamless finish.
Work Area Cleanup
Gather all debris, including scraps of Hardie plank, nails, and packaging materials. Sweep the area thoroughly to remove any loose particles. Use a shop vacuum to remove dust and fine debris. If you used a ladder, carefully lower it and store it properly. Dispose of all sharp objects like broken pieces of siding or used utility blades carefully.
Debris Disposal
Most construction debris can be disposed of through your local curbside waste collection service. Check with your local waste management provider for specific guidelines on acceptable materials and disposal methods. Larger pieces of Hardie plank might need to be broken down into smaller, manageable pieces before disposal. Always follow local regulations and safety precautions when handling and disposing of construction waste. Many municipalities offer recycling programs for construction materials; inquire about the possibility of recycling your waste.
Post-Installation Checklist
Before considering the job complete, verify the following:
- The new Hardie plank is securely fastened and flush with the surrounding siding.
- All gaps and seams are completely sealed with caulk.
- The caulking is smooth and neatly finished.
- The work area is clean and free of debris.
- All tools and materials are properly stored.
- Construction debris has been disposed of properly and safely.
Illustrative Examples of Hardie Plank Replacement
Replacing Hardie plank siding can seem daunting, but with the right approach and understanding of different scenarios, it becomes manageable. This section details three common replacement situations, highlighting the specific steps, challenges, and solutions involved. Remember to always prioritize safety and follow manufacturer instructions.
Small Section Replacement
This scenario involves replacing a small, damaged area of Hardie plank, perhaps due to a minor impact or localized weathering. The repair is relatively straightforward and requires minimal tools and materials.
- Steps: Identify the damaged section, carefully remove the affected plank using a pry bar and reciprocating saw, ensuring minimal damage to surrounding planks. Measure the replacement piece, cut it to size, and apply construction adhesive to the back. Nail the new plank into place, ensuring proper alignment and spacing. Caulk the seams and edges.
- Tools and Materials: Measuring tape, pencil, reciprocating saw with a fine-tooth blade, pry bar, hammer, nails, construction adhesive, caulk, safety glasses, work gloves.
- Challenges and Solutions: Difficulty in removing the old plank without damaging surrounding areas can be addressed by using a sharp blade and working slowly and carefully. Achieving a seamless match in color and texture might require purchasing extra planks to ensure consistency. Using a putty knife to apply a thin layer of caulk ensures a neat finish.
Large Area Replacement
Replacing a large section of Hardie plank, perhaps due to extensive water damage or storm damage, requires more planning and effort. This scenario involves replacing multiple planks or even an entire wall section.
- Steps: Assess the extent of the damage and plan the replacement accordingly. Remove the damaged planks, taking care to maintain structural integrity. Prepare the area by cleaning and treating any underlying wood. Measure and cut the replacement planks, ensuring proper alignment and overlap. Install the new planks, using appropriate fasteners and ensuring proper spacing. Caulk all seams and edges.
- Tools and Materials: Measuring tape, pencil, reciprocating saw, pry bar, hammer, nails, construction adhesive, caulk, safety glasses, work gloves, possibly a circular saw for larger cuts, scaffolding for high areas.
- Challenges and Solutions: Maintaining structural integrity during removal of damaged planks can be addressed by supporting the surrounding area. Matching existing siding color and texture across a large area may require purchasing multiple planks from the same batch or using a color-matching paint. Working at heights requires appropriate safety precautions, such as using scaffolding and harnesses.
Corner Replacement, Replacing a piece of hardie plank siding
Replacing Hardie plank in a corner presents unique challenges due to the angled cuts and precise fitting required. Accurate measurements and careful cutting are crucial for a professional-looking finish.
- Steps: Measure the corner carefully, accounting for the angle and overlap. Remove the damaged planks, ensuring clean cuts. Cut the replacement planks at the correct angle, using a miter saw for precise cuts. Apply construction adhesive and nail the planks into place, ensuring a tight fit and proper alignment. Caulk the seams and edges.
- Tools and Materials: Measuring tape, speed square, pencil, miter saw, reciprocating saw, pry bar, hammer, nails, construction adhesive, caulk, safety glasses, work gloves.
- Challenges and Solutions: Achieving precise 45-degree cuts for a tight fit in the corner requires a sharp blade and careful measurement. Maintaining consistent spacing and alignment throughout the corner area can be challenging; using a speed square helps ensure accuracy. Any gaps or inconsistencies can be filled and sealed with caulk for a professional finish.
Last Word
Replacing Hardie plank siding successfully hinges on careful planning and precise execution. By following the steps Artikeld in this guide – from identifying the damaged area and preparing the work space to installing the new siding and finishing touches – you’ll achieve a professional-looking repair that protects your home for years to come. Remember to prioritize safety and take your time; a well-executed repair will enhance your home’s curb appeal and structural integrity.
General Inquiries
Can I replace just a single plank without replacing others?
Yes, you can often replace individual planks. However, consider the surrounding planks’ condition. If they’re also damaged or nearing the end of their lifespan, replacing multiple planks might be more cost-effective in the long run.
What type of caulk should I use?
Use a high-quality, exterior-grade caulk specifically designed for use with fiber cement siding. Look for one that’s paintable and flexible to accommodate movement.
How long does Hardie plank siding typically last?
With proper installation and maintenance, Hardie plank siding can last for 30-50 years or more.
What if I damage the underlying sheathing during removal?
Repair any damaged sheathing before installing the new Hardie plank. Use appropriate materials to ensure a solid base for the new siding.
Do I need a permit to replace Hardie plank siding?
Check with your local building department. Permits are often required for significant exterior renovations, but smaller repairs might not need one. It’s best to check beforehand.
Comments are closed.